Well I finally did it. I stopped putting off winterization. (Isn't that a weird word? One of the thousands of strange boat-isms)
Anyway. After attending my grandfather's funeral and wake on Saturday, Greg and I stopped by the boat to grab a couple of things and I happened to see Captain Phil of the Pintita, former boss and teacher of the USCG Captain's Course I took a couple winters ago. Capt. Phil is a STICKLER for early winterization, though to be honest it's only barely frozen overnight a couple of times this season. And with my boat in the water, it's not likely to freeze hard enough to crack the engine block anytime soon. But I'd purchased the antifreeze and I figured it was about well on time to get the antifreeze pumped through. And seeing the good Skipper lit a fire under me to be a prudent boater.
Luckily, winterizing my engine is a short procedure.
My engine, being an inboard diesel, is seawater cooled. It sucks water directly from the Bay, through a filter, and then around the engine to cool it when it is running. In the wintertime, if you don't replace this water with antifreeze, the water inside your engine can freeze and expand and crack your engine block. If you're keeping your boat in the water, you can wait a lot longer to winterize your engine because the water holds heat and until the water starts freezing, you don't really have to worry about this. If you store your boat on land in winter, you need to winterize for sure before removing your boat from the water.
Most boaters, including me, use potable antifreeze (which is pink, as opposed to antifreeze you use in your car, which is usually scarily green) for winterizing because you end up pouring an entire gallon of it directly into the Bay. On Misty, to winterize the engine, all I needed to do was fill a bucket with the pink stuff, unscrew the band holding the hose to the intake seacock (which I closed, thank you very much), pull the hose off, place the hose in the bucket 'o' antifreeze, and start the engine. Greg was quite helpful at this juncture. It's VERY difficult to get into and out of the engine access hole on Misty, so he was kind enough to fulfill my tool requests and watch the exhaust water to make sure it was turning fully pink.
And that's it! After the engine has sucked up a whole gallon of antifreeze and spat it out the back, all you need to do is reattach the hose.
Come spring (or a suitably warm winter day!) all you need to do is open the seawater intake seacock and start the engine and voila! Seawater cooling and antifreeze feeding the fishes.
Now if I could just muster the desire to fill my water tank so I can do some dishes tonight...
Showing posts with label boat maintenance. Show all posts
Showing posts with label boat maintenance. Show all posts
Monday, December 19, 2011


Tuesday, December 7, 2010
Misty gets naked...
After watching a neighbor's roller-furled jib flog itself to shreds last week, I decided it was time to take my own sails off the boat.
 I enlisted the help of my ever-happy-to-help friend Andrew. Hi, Andrew! (He agreed to help AND to let me take pictures for my blog -- what a sport!)
Anyway, I was a little uncertain about taking the sails off by myself. Mostly because it is shockingly difficult to brick up sails (i.e. fold them into brick-like blocks) on the dock by yourself. And by that I mean that I don't think I could do it since the marina is so exposed to wind. It would have to be a really calm day.
Now, where was I? Oh yes. Flogging jib = bad. Taking sails off for winter = good.
So Andrew comes over and we start with the jib, also known as "that little sail on the bow of the boat." On Misty Rose, the jib is roller-furled, which means that it has a mechanism that rolls the sail around the a line that runs from the top of the mast to the deck so that you don't have to fold it every time you use it. Therefore, the sail must be unfurled from the forestay, dropped with the halyard, unclipped at the tack and the head, and the sheets must be untied and coiled.
Easy-peasy!
I unfurled the jib and released the halyard. We then discovered a need for pliers to get all the shackles undone. Is it just me? Or does the rest of the world have the same shackle woes as I? I pulled out my giant tool bag, which, someday, I shall photograph the contents of for you all. Tool kits of sailboats are truly strange things filled with everything from electrical tape to plumbers' wrenches to sailcloth needles and joker valves. After much rummaging, I found a suitable pair of pliers and we set about removing the sail. At this point I also remembered to take pictures.

I found some line and tied the roller furling mechanism to the base of the forestay so that, in a storm, the car attached to the halyard wouldn't work its way up to the top of the forestay. I am not actually sure if that's possible (wouldn't it just slide back down?) but the charter boat captain I work for does it on his boat, so I figure it's a solid bet.
We carried the sail off the boat to brick it up. Misty's jib is easy to brick because it has no battens (fiberglass sticks sewn into one side to help the sail stay flat).

Luckily, the marina has a very wide dock, so we were able to flake and brick on the dock and we didn't have to carry the sail to the parking lot. Andrew took the head (top) of the sail and carried it up the dock, while I stretched out the foot (bottom) of the sail.
Then we flaked it. To flake a sail, two people get on each side of the sail and pull folds of the sail toward the foot until it looks just like this:

Then you simply fold it into a brick. Misty's jib will spend the winter in the dock box.
The main sail was a little harder to handle. Since the main has battens, you have to be very careful when you flake it so be sure that the battens are exactly parallel. This is how we accomplished that:

The main is much heavier than the jib and doesn't fold up as small (battens don't bend), so we tied a neat little handle to it. I used sailor knots. Andrew insisted his were climbing knots, though I think they closely resemble sailing knots...


And voila! The finished product:

And now Misty Rose is shockingly nude... Hope she's not too cold!

Monday, November 15, 2010
The haul-out...

So in my last entry about the horrific nightmare that is winterization, I mentioned that I was having my boat hauled out by the marina.
Well Wednesday morning it happened. I was on "flex" as I live in the marina and wasn't too worried about when they'd get to me. I got up early just in case I ended up with one of the first slots and wandered up to the marina office and discovered that Misty would be hauled out at 10:15 a.m. I could live with that. I went back down to the boat to make coffee, have some cereal and get my camera ready. I'd never seen Misty out of the water before. The last time she'd been out of the water, about two years before, I had been away at school and hadn't really wanted much to do with the boat. (I feel guilty sitting in that same boat typing this now -- sorry, Misty!)
Anyway, 10:15 rolled around and coffee in hand, I stepped out to meet the yard guys, who wanted to know if I wanted to drive the boat over or be towed. I wanted to be towed. I wanted to take pictures. Plus I was super nervous. After asking very thorough questions about the location of my keel (fin) and the location of my stuffing box (just ahead of the wheel) and my knot meter (nooooo clue), the guys were ready to tow my boat over and haul her out.

Basically what happens, for the uninitiated, is that they tow the boat to a patch of water with concrete dock on three sides. A large sling apparatus can be driven onto the parallel sides of the dock and a sling can be pulled underneath the boat. Then the boat is lifted up and the slings are driven onto solid ground. I just did a short haul, so the boat stayed in the slings. If I'd been coming out for winter storage, they would have used blocks to brace the boat from the sides and stand her on her keel. But we'll talk more about that later.

I was actually surprised at the lack of barnacles. Sure, she was a little scummy, but not heavily covered in barnacles. This was a good sign.

The marina guys gave Misty a good and thorough power washing (have I mentioned I love this boatyard?) And changed the zinc for me. I'd offered to do the zinc myself, but you can't do any work on your boat when she's in the slings. Liability issue or something. Remember how I talked about winter storage? Putting the boat on blocks? Well whoever painted Misty last was very very lazy. That square block of lighter paint on the bottom? That's where the last boatyard we used didn't move the blocks to paint underneath them. Come spring I'll do the bottom painting myself. Yeesh.

In this picture, you can see the propeller clearly. The knob above the propeller on the shaft is the zinc. Zinc is what's called a "sacrificial." Basically, the zinc is there so that rust will eat the cheap piece of zinc and not the expensive-to-replace propeller. They unscrewed the old one and replaced the new. Zinc, in a boat heavily used, should be replaced once or twice a year. Three times is a little excessive. Twice is extra safe. Once is fine. Doing it less than once a year is not recommended. Of course we've never done that. Ahem.

Anyway, once she was all scrubbed and zinc'd, they dropped her back in the water and I breathed a huge sigh of relief.
It's funny. I see the same guys sling boats in and out of the water without mishap every day. But when it's your boat? I don't think anyone could help but worry...
Thursday, October 21, 2010
My new best friend...
 I would like to announce to the entirety of the blogosphere that I, Aleksandra Robinson, have a new best friend.
His name is Buster. Dust Buster.
For the past six months I have had a tiny shop vac. It's a workhorse. It's a great vacuum. Except when it comes to the small stuff. It just doesn't have a lot of sucking power. It makes cleaning the little bitty dusty bits difficult, I'm sad to say.
But the other day, my mother offered me a DustBuster. She originally bought it to vacuum crumbs off of my grandfather. Lately? She hasn't needed it for that. Poor Buster has been sitting -- unloved -- in my parents' basement.
I'd forgotten to take him with me the last few times I'd visited my parents, but when I went over to do laundry and give blood (at a donor center, not at their house) this week, I finally remembered to take Buster with me.
He needed a bit of a charge when I got him home, but then he was ready for action. This morning I pulled him out and got all the itty gritty little corners and cobwebs that plague me. Seriously. They plague me.
Now my floor and nooks and crannies are all clean and dust-free.
I'd recommend a DustBuster to any liveaboard for this reason. They're easy to pull out and use quickly. My shop vac is a bear to get out and use. This little thing is a breeze.
When you've got a tiny space to keep clean, it's much more of a challenge than a large space because any clutter or dirt makes the whole deal look dirty. For instance, today I had crusty bread. Normally, I'd break bread outside, hanging over the side of the boat to keep the crumbs away.
Today? I broke bread with abandon and Buster was there to clean up the aftermath.
I'm telling you. Buster is my new bff...
Monday, June 21, 2010
My hands may never be the same...
 Well. It's been a while again. But boy do I have a good story for you.
So this past spring, my friends Mark and Christine and I decided to take a trip. We'd been discussing a nice sail to Chestertown for more than a year and we decided it was time. Christine was early in a pregnancy and once the baby was born, who knew how long we'd have to wait to cruise? Spring was the perfect time -- the only time -- for our long-awaited cruise.
Also, Mark and Christine being a pastor and student pastor respectively, we couldn't go over a weekend. No problem! I work a lot of weekends... why not take four days off?
We decided to take Mark and Christine's newly acquired boat, Dreamscape, a 30-foot Catalina. It was only fair. They'd both been aboard for parts of the trip to Washington, D.C.
It all seemed good the day we left. Preparation was a little involved as it was the boat's first trip of the season. And, of course, they don't live aboard, so they wouldn't have as much stuff aboard to start out as I did.
All in all, the Catalina 30 is a solid boat. She's fast, and with a wing keel she can go where my boat cannot. After a few hours dockside, we were able to take off with a favorable wind direction and head to the Chester River.
Relaxation at last!
Yeah right.
No sooner had we decided to turn the engine on a second time (the wind died midday) than it started to overheat and, finally, it shut off. After anchoring in the middle of the Chester, I set about to take a look-see.

You know it's not a good day when I am the most-knowledgeable "mechanic" aboard.
I gamely cracked the engine ports -- all four of them, easy access be damned -- and set out to check out with a flashlight why we were in such trouble.

It was easy enough to find. Two jets of brilliant neon green fluid were leaking out at an astounding rate. Yup. That was the coolant. Now we knew why the engine was overheating at least.
No problem, thought I. I'll patch it up, add more antifreeze, and we can limp into Chestertown and buy more. That'll get us home. After all, this was a sailboat! Motors are for people who don't know what they're doing.
Right.
Well, first off, there was no antifreeze aboard at all. And few tools. And still fewer things to patch holes with.
Duct tape. It was all we had. And it can solve any problem, right?
 Sure it can. So laying on my stomach with the side door to the engine propped open with my head and a flashlight between my teeth, I set about patching the leak with Christin handing me duct tape to my exact size specifications. I wrapped that heat exchanger (the source of the leak) like a Christmas present. I wrapped it with layers and layers of tape.
There was still a little fluid left in the resevoir. We'd sail into Chestertown the next day and buy more.
We sailed all day and came to anchor under sail in Chestertown around 2 p.m. the next day. We'd hit a patch of dead air and lost some time, but we got there.
 Mark and Christine inflated the dignhy and Mark rowed us ashore. Yes. Rowed. They have no outboard. Miraculously, we got there. The Chester has a little current the way the North Atlantic has little waves.
 And then we found a shop with antifreeze! Pay dirt! And they had a gallon of distilled water! We carried our booty to the dinghy and proceeded to have a lovely evening of walking around town and having a nice seafood dinner.
 When we got back, we went to bed to tackle the heat exchanger in the morning.
See the lovely green liquid on the galley table? That's what antifreeze looks like. I wish I could tell you what burning antifreeze smells like.
We filled it up and ran it... and it worked. For a time. We hit Queenstown that night in need of still more antifreeze -- and we ran aground a few times by losing power in the tiny chanel that marks the entrace to Queenstown -- a one-horse town in posession of a post office and a pizzeria. No gas station. No marine supply store. The kind harbormaster offered to drive us for some in the morning, but being intrepid walkers, we asked directions to a gas station. Five miles away. Some nice people in the pizzeria gave us some antifreeze.
It took three gallons of antifreeze and half a roll of duct tape and some JB weld the dockmaster gave us, but we made it back. We sailed the entire trip. Sailed to anchor four times. I sailed into the dock in Queenstown without the motor once. And we made it.
It's all about resourcefulness, people.
But I think my hands still smell of burnt antifreeze...
Thursday, April 22, 2010
Is that a dinghy in your pocket...?
Just like every guy needs a wing man, every boat needs a dinghy. It's just a fact of boating. My dinghy? It was missing. Misty Rose was incomplete. She lacked her wing man.
We'd always kept the dinghy (which was new when we bought the boat) underneath the porch at Oak Harbor. And this year, when I moved back from Washington, D.C., and we decided to look for it, it was missing.

Luckily, when Dad called Oak Harbor to find out What On Earth They'd Done With The Dinghy, they admitted they'd moved it into the shed. Without telling us.
Good thing we asked.
So on my day off, rather than sail, we went down to Pasadena and muscled the deflated dink into the car. And no. I don't have an explanation for the plastic bag hanging out of the back of my jeans.

For the whole year I've lived on the boat there's been a mysterious orange thing in a plastic bag. Apparently it's the dinghy pump. Good thing dad wouldn't let me take it off the boat, huh? I have a whole cabinet on the boat dedicated to Dad's bric-a-brac and crock-a-crap.

Putting the pump together was not too much of a mystery. I mean, I've got degrees. I can handle a pump.

Sadly, the pump came with six nozzles and a pressure gauge, which I never got to work. Maybe I should have stayed back in grad school for a dinghy 101 course.

I resorted to everyone's favorite method of trial and error for fitting the correct nozzle to the pump ports. Interestingly enough the nozzles lock onto the plastic ports. There's a spring-loaded thinger inside each one that needs to be depressed, we discovered, in order for the air to stay in when the nozzle is removed. This was discovered after much pumping.

Here I am pumping.
 Dad took a turn. And pumped about 10 times before handing the reins back to me. I am daughter. Hear me roar!
 I finished up the job more or less quickly.
 And then took a nap on the dock while dad went to get the lock. Pumping is no easy job, OK?

After that, all I needed to do was tie her up and lock her down. Of course I locked her down. I mean, people have no problems stealing hoses and hoses have a lot in common with dinghies. Like... they're both made of rubber.
Now I just need to wash it. It's looking like it spend a couple years under a porch in Pasadena and we can't have that now, can we?
Wednesday, March 31, 2010
It's all about getting ahead...
Oh yes. It's every boat owner's nightmare. A broken head. This spring, upon opening the seacock for the seawater intake that provides the water for flushing, I discovered, much to my horror that something -- and I'm sure only God knows exactly what -- had somehow broken in the head.
Oh it would pump dry. But water would not come in. I died a little inside. When the dial was turned to "flush," the handle would become almost impossible to push down and no water would appear in the bowl. I almost cried a little bit. Almost. OK, maybe one tear. Don't judge.
Anyway, once my serious panic had subsided, my dad mentioned that some guy in the boatyard had said that pump repair kits could be bought and that it would likely solve my problem.
Pump repair kits? Yeah, they cost $75 for a Raritan head -- which is, of course, what I have. Just so you know. And the Golden Anchor coupon I'd gotten from US SAILING and had been saving? It was expired.
So I gritted my teeth and paid full price. When I finally got the courage to open the little plastic box on Saturday, I was relieved to find instructions. And I was not so relieved to discover a large amount of strange parts never mentioned in the instructions.

That's the box, sitting on the head. See that red thing? I never used it. No clue what it's for. But you can bet that at $75 I saved the darn thing.

The first thing you do is close the seacock and take the handle arm apart. The instructions are very specific that before beginning work you should CLOSE THE SEACOCK. No sweat. Then it gets scary. It involved a 7/8" deep well socket (don't even bother going to Wal Mart, all they have is metric.) It involved taking a cap off and putting in new rubber and plastic bits.

It involved a new black rubber ball, the function of which I can only guess at.
And finally it included "Raritan Super Lube." Get your mind out of the gutter. I smeared that stuff all over the part of the pump that moves (I'm pushing on it in the second picture) , reattached the handle, opened the seacock again and pumped -- and darned if it didn't start flushing like a champ!
I may not know a thing about marine electronics, but I can sure do some plumbing with the right tools and a well-thought-out chart. First the seaweed and now the head pump? I'm unstoppable.
At least until something else breaks.
Friday, December 4, 2009
The refrigerator has landed.... (!)
Well, faithful readers, the day we've all be waiting for has come. The refrigerator has landed! My dad texted me yesterday to say that a box had been delivered... and then again when a second box arrived. Inside? The guts of a refrigeration system! Yay!
Pictures when I go home this weekend and get a peek in the box, but I'm too excited not to share. Visions of butter, milk and not carrying ice are dancing through my head with wild abandon. Stay tuned to find out all about it!
Pictures when I go home this weekend and get a peek in the box, but I'm too excited not to share. Visions of butter, milk and not carrying ice are dancing through my head with wild abandon. Stay tuned to find out all about it!
Tuesday, November 24, 2009
Giving thanks for clutter-free cabin...
I love working on the boat, but when we really get down to it, the mess is downright scary.

Yikes. My knee is twitching a little just looking at a picture of the clutter defiling my ship-shape home. Deep breaths. I am not a neat freak. Goosfraba.
I'll give a prayer of thanks for cleanliness and lack of clutter. Happy Thanksgiving!

Yikes. My knee is twitching a little just looking at a picture of the clutter defiling my ship-shape home. Deep breaths. I am not a neat freak. Goosfraba.
I'll give a prayer of thanks for cleanliness and lack of clutter. Happy Thanksgiving!
Excuse me, I can't talk right now, I'm killing seaweed...
As I mentioned in an earlier post, my freshwater tank was growing seaweed. Some of you have pointed out that it was, in fact, algae. I would like to point out that it is now past tense seaweed. Yes, ladies and gentlemen, I extinctified the seaweed. I killed it so dead I had to make up a new word to celebrate. Extinctified. It has a nice ring to it.
Let's back up. Dad and I made a date several weeks ago for a Saturday, all-day work-on-the-boat blowout.
My mission? To kill (I hadn't yet invented the word 'extinctify') the seaweed in the water tank and figure out why the water pressure wasn't working.
Dad's mission? To get rid of more crap on the boat and install the stove-microwave cabinet he built (post to come) and install a light switch.
Degunking the water tank turned out to be such a job that all dad got to do was install the cabinet (which I actually did) and to put a shelf up. Then he had to help me degunk.

He helped by taking pictures. And by helping me fill and empty the water tank and unclog the filter.
First, I liberally slopped bleach into my water tank and gushed it around with a cup. Then I reached in with the longest, thickest gloves I could find in Wal Mart (they were pink and some of the proceeds from the sale went to breast cancer awareness) and a scrub brush and set to work on the walls. There was black slime coating the walls in addition to frond-like seaweed floating peacefully in the water.
Then I turned the water pressure on at the switch. I heard the motor going and turned the handle on the sink -- nothing. Hm, I says to dad. Why ain't the water pressure a-pressurin'?
Turn it off, says he, and let's have a look-see at the plumbin'.
OK, so we're not that Southern. We're from Baltimore. But I thought it would jazz up the bleaching experience for you, right? No? Moving on...
There turned out to be a line headed from the tank toward the motor (of course), but we couldn't see the entry. So we bailed out about 15 gallons of water with a plastic cup.

I look troubled, don't I?
After that, we discovered the line was clear so far as we could see. My father, brilliant plumber that he is, figured there should be a filter before the pump's motor to keep gunk out of the motor. And we found it. I didn't get a picture, but it's a small clear yellow square. We had to unscrew four bolts, find the four tiny rusty nuts and clear the black gunk from the filter and put the thing back together.
Not wanting to clean the filter twice (it took the two of us probably 45 minutes to take it apart, clean it and put it back together -- it's in a very awkward spot) I set to cleaning the tank anew, using a cup to clear all the water and a sponge and many buckets of water to take out all the seaweed. Every once in a while I'd lay my head flat next to the opening and peer this way and that looking for more gunk with a flashlight. When I was satisfied the gunk was gone, I used a little more bleach. Then I pulled in the big guns.

I found this stuff in West Marine when we stopped to pick up screws. At that point, I was willing to try anything.
Not to sound like a commercial, and no, they didn't send me anything, but this Thetford cleaning duo is AMAZING. Buy some. Your water tank will love you for it.
I emptied 10 ounces of the blue stuff into the tank and filled it with water. Alarming amounts of suds started to form. I only panicked a little, I'm proud to say. After I filled the tank to 40-gallon capacity, I turned on the water pressure switch and said a little prayer.
Water came gushing out of the sink! It also came gushing out of the head sink -- the one we didn't think worked! (This praying stuff must have something to it.)

Look, water! I know this picture it bad, but I had wet hands and probably shouldn't have been touching my camera at all, but such was my thrill that I couldn't stop myself.
I had to push aside my thrill through because this project was barely begun. Once the tank was empty, we filled it again and emptied it with the sink and galley foot pump. Then we had to fill and use some of the clear stuff and empty again. Then we could fill it up a final time and add a little freshener. My father is skeptical of the freshener (of which I added two ounces) but I think it does make tank water taste better.
So there. Why don't you take out the trash, Dad? Isn't that what daddies are for?

To which he says, "Not so many pictures of Daddy on your blog. You're liable to scare people." Aww, he's just being coy.
To this I say, you can call me Allie The Seaweed Extinctifier. Today victory tastes like sweet, fresh water.
Sunday, November 22, 2009
Let's get this finished...
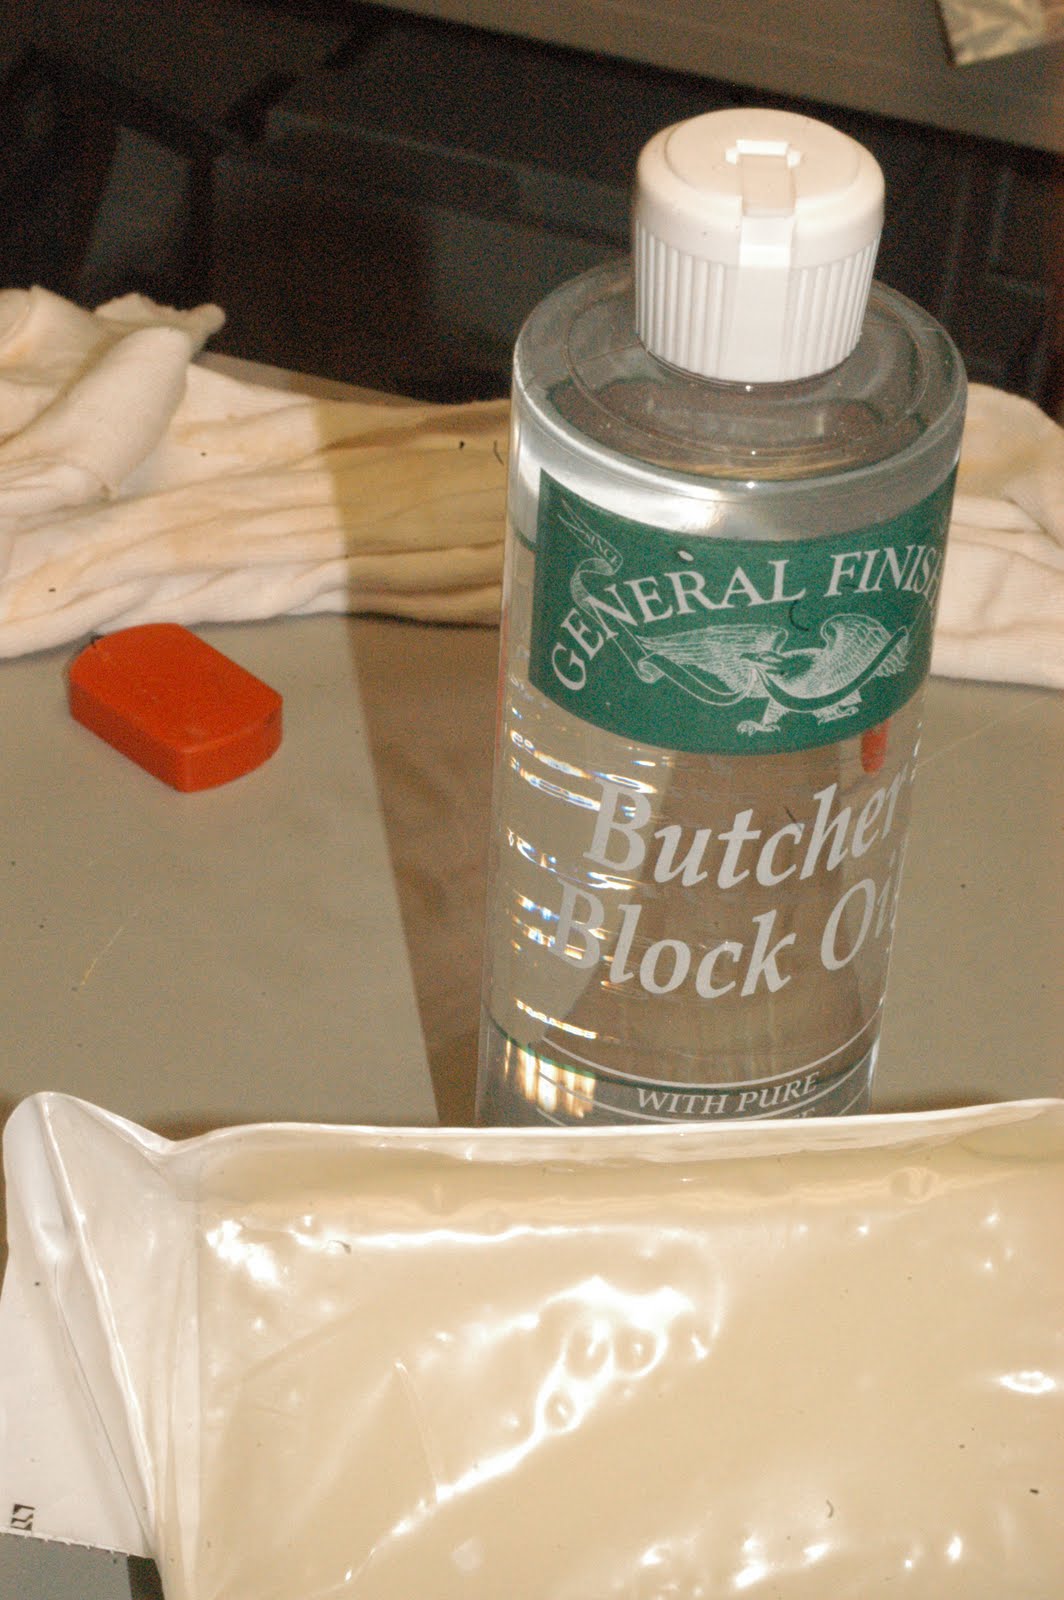
Now that Dad (aka Handyman Extraordinaire) has routed and sanded and glued my new over-sink cutting board, we need to finish the board. Clearly varnish would be bad -- no one wants to eat varnish. So to finish the cutting board, we decided the best course of action would be to mix mineral oil with beeswax. The cast of characters:

In a glass bowl, (obviously plastic would be a bad choice,) we poured out a little bit of oil and then shaved the wax into the oil using half of an old pair of scissors because we didn't want to gunk anything else up. (I actually did most of the shaving, but I photographed dad doing it).

I put the whole business in the microwave (it took a surprisingly long time to melt -- like three minutes) and stirred it up. Here is the finished solution:

With a clean rag I wiped the waxy oil onto the board and let it soak in. The colors of the wood really started to pop.

Here Dad, Madame Secretary and I are with the cutting board. Mom took the photo.

And here it is on the boat! Ahh, counter space! Check back for another post on using the board...

In a glass bowl, (obviously plastic would be a bad choice,) we poured out a little bit of oil and then shaved the wax into the oil using half of an old pair of scissors because we didn't want to gunk anything else up. (I actually did most of the shaving, but I photographed dad doing it).

I put the whole business in the microwave (it took a surprisingly long time to melt -- like three minutes) and stirred it up. Here is the finished solution:

With a clean rag I wiped the waxy oil onto the board and let it soak in. The colors of the wood really started to pop.

Here Dad, Madame Secretary and I are with the cutting board. Mom took the photo.

And here it is on the boat! Ahh, counter space! Check back for another post on using the board...

Wednesday, November 18, 2009
The handyman maketh, the daughter sandeth...
 This is my Dad. I talk about him a lot on this blog because... well... he owns the boat I live on. And because he's my father. That too. We argue a occasionally. OK, a lot. But he's pretty handy. He can plumb (do plumbing?) and wire stuff and build stuff... and I generally like to have him around. Unless we're fighting. Which we won't in this post, I promise. Really.
Dad loves wood. He certainly has a huge collection of it. And he likes to take classes about what to do with it.Sometimes this turns into really sweet stuff. Today, it turned into sweet stuff for the boat.
 That thing he's holding? Yeah, it's my new cutting board. He glued end scrap pieces together (apparently this involved a lot of clamps). Today, we'll see how those scraps (Cocabolo, maple and teak) turned into a cutting board. As you can see, the left hand corner has a piece sticking out. This will never do, says my Daddy-o. Buckle your seatbelts. There's a lot of sanding involved.
First he has to sweep the bits of the last project into the dust collection system.

Before anything, he cuts off the protruding piece to make the edges smooth. And then... sanding. Hey, I told you there would be a lot of sanding, don't look at me like that.


And now wiping. It's important to get all the dust off and feel the wood carefully for rough spots.

Now we need one of these doo-hickeys because I requested rounded edges. I know, I'm a princess.

Now Dad has to install the doo-hickey into the router.

Did I mention he likes to make funny faces when he works? No? Noises too. Here's another:

My parents' dog Charlotte, a.k.a my father's secretary, is very interested in proceedings. Because, you know, there might be a liver snack hidden in the router.

The routing begins and Madame Secretary high tails it out of the room. The dust collection system is her hated enemy, cousin of the vacuum cleaner.

Ooh look, I get to help. I plugged in the dust collection system all by myself!

I even get to sand a little. (Can I please state for the record I had just woken up after a weekend of confirmation church retreat? Middle schoolers really take it out of you. Normally my eyes aren't quite so puffy, OK?)

And then Dad finished up the sanding. What can I say? He's good at it.

Next post? Finishing the product...
Subscribe to:
Posts (Atom)

 Posts


